Homebrewing


Finally received my scores for this year’s entries. Last year I submitted a couple of beers from what was on hand just to see what would happen. I was glad to receive feedback from the judges and was pleased enough to receive midrange scores despite the fact that neither placed or advanced to the finals. This year I submitted two of my favorite recipes (one of which had done very well in a regional competition) with higher hopes. Sadly, neither placed or advanced.  The scores were in the same range, too. Still, the judging comments should be useful when those arrive later.

The header image above shows the result of my NHC entries last year. Not very impressive, but gratifying nonetheless. I hadn’t brewed anything specifically for the event and just chose a couple of beers I had on hand to submit. I hope to do a little better this year, as I brewed a couple of my favorite recipes for this event. I don’t expect to place, but I do hope for significantly higher scores.

One is not my own recipe, but is a slightly modified version of a recipe I have brewed again and again. It is based upon a Russian Imperial stout by Annie Johnson. I like it too much to fiddle with the recipe  extensively but I did substitute Crisp Maris Otter malt for the original base grain of American pale ale malt. It is a big beer; uses 32 pounds of malted grains to make 10 gallons and comes out with over 10% abv. It has a big stout flavor, though (especially when brewed with the Maris Otter), and that balances the high abv. I call it Black Hole Russian imperial stout.

The other submission is my own recipe and is a more conservative beer. It is a chocolate porter, the result of many iterations in search of one that I can both enjoy and call my own. The chocolate flavor comes entirely from the grains selected; no chocolate, cocoa, or flavoring added. I’ll even share the secret that made this batch the final version: I replaced about half of the usual chocolate malt with chocolate rye malt. I don’t usually like the taste of rye malt. Fortunately, the roasting process that brings out the chocolate flavor tames the rye “twang” and yields a very smooth, sweet chocolate taste. I prefer it to the bitter flavors of the usual chocolate malts derived from barley. This Dark Nebula porter is around 7% abv and is another balanced brew.

The big issue now is whether they arrive in time to make the submission deadline. For whatever reason, I didn’t get around to shipping until Monday. The required arrival date in Chicago is today. They are scheduled to be there on time but we will see…

It has been too long since I have provided a brewing report. I have been active but haven’t been documenting or photographing the sessions. On Dec 31 I brewed ten gallons of my Imperial India pale Ale recipe (Galactic IIPA).As the recipe shows, it is a fairly large brew – about 30 pounds of malted grains and over a pound of hops.  I used the three vessel HERMS/RIMS rig I completed last Spring.

l

I divided the output into two fermenters. This keeps the weight of each down to manageable levels plus the smaller carboys fit well in my chilled fermentation chamber. I can get 5 such vessels in there at a time. After a week to ensure that primary fermentation is complete I will add the dry hops to the fermenters and let the process continue for another week. Then it will be ready to carbonate and keg or bottle.

l

grainfatherchilling

It seems as though there should be something between the Zymatic (compact, highly automated, 2.5-3 gallon batches) and my three vessel HERMS/RIMS setup (large, slightly automated, 10 gallon batches). Actually, there is, and has been for a while. Those crafty brewers down under, who originated the single vessel brew-in-bag concept, inspired Imake of New Zealand’s all in one Grainfather brew-in-a-basket system a few years ago.

It strikes a happy medium for many. It easily manages the 5 gallon batch size that is common in the US, and also the 6 gallon brews that are the usual in Australia and New Zealand. It has about the same level of automation as my three vessel setup but fewer switches and buttons to manage. It also fits pretty well into my kitchen so I can stay indoors when the weather isn’t cooperating and operates from a standard 120VAC, 15A GFCI outlet.

This just a glance at the product after the first brewing session. I will probably do a more thorough review after a few more brews. As easy as it is to use, that probably won’t take long.

The brief report is: we brewed a milk stout with pumpkin spices and with roasted pumpkin rind in the mash. Using the Beersmith Grainfather profile, gravities and volumes were dead on. Operation was simple, and cleanup fast and easy. It offers the simplicity of brew in a bag without the bag to dump and launder. Looks fine, so far!

rollingcontroller

After several uncomfortable brew sessions on hot, sticky days I plan to be more careful about hot weather brewing in the future. It makes more sense to stay inside where it is air conditioned and brew on the Zymatic on such days. Nonetheless, this brew was scheduled a while ago and will go forward tomorrow despite predictions of 89 degrees and 80% humidity. The result will be 10 gallons of my galactic american pale ale plus lots of sweat. As shown in the photo above, I have mounted the controller onto its own wheeled platform. I can now move everything around in search of a cooler spot rather than being tethered to the previously wall-mounted control box. I will try to remember to take photos during the session; if I get anything good they will appear here.

final assembly

It looks a little neater now; I shortened all of the hoses for a cleaner setup. The third test brew yesterday went well, though the day was far too hot for it.  That was aggravated by the fact that I kept the door behind the rig closed this time. That killed the breeze that had provided some measure of relief on previous brews. That breeze was making it difficult to “dial in” the burners, as it was blowing right into the vented areas at the rear of each burner. Once I have the control box mounted on its own stand I will be able to position the brewstand to avoid that. As it is, everything is tethered to the fixed controller location so I don’t have much freedom of movement.

With the flames undisturbed I could make the area even less comfortable by cranking the burners up! Boiloff was initially higher than intended and I had to cut the boil flame down to avoid losing too much volume.  I haven’t yet weighed the propane tank but I expect fuel consumption to be down a little from the 7 pounds I used last weekend. I think I will end up around 3 pounds for a 5 gallon brew and 6 pounds for ten gallons. That would put me about where I was with the original gravity feed system I had been using; I can live with that. The burners can be switched over to natural gas by swapping a spring in each solenoid valve and drilling out an orifice in each burner. When I get around to that my fuel costs will drop greatly.

I don’t know at what temperature the ground water was, but I was able to get the boil kettle down to 75 degrees very quickly by recirculating through the plate chiller. Transfer into the fermenters was at 65 degrees. I doubt that the ground water will ever be much warmer than it is now, after a couple of weeks of 90 degree days so I should be free of cooling concerns.


13gallon mash

The second session went well.  It was, for me, a big batch of a big beer. I scaled up the recipe for the 10%abv Russian imperial stout that I have produced several times on the Z to ten gallons for this rig. No room left in the mash tun, but it all worked OK. Batch size is a complicated decision. I can spend all day in the barn and make either 5 or 10 gallons. It seems a no-brainer to choose to make 10. On the other hand, it is a hobby and I can brew twice as frequently (and have more variety) by selecting 5 gallon batches. Right now my perceptions are skewed a bit because I have been making 2.5 gallon batches all year so even 5 gallons looks like a lot of beer. There is no economy of scale with larger batches because (to my surprise) propane consumption doubled for the 10 gallon brew and ingredient costs are constant because I always buy bulk grains.

Meanwhile, the fermentation freezer is full. I don’t even have room for the 2.5g batch I brewed Friday so it is still sitting in a sink of cold water. I need to rack a couple of kegs from the freezer this afternoon. I’ll need to rack some more to make room for the brew I plan to do next weekend. Then I will be shut down until some more brews complete fermentation. Three weekends in a row on a conventional system is very unusual for me. I am just exercising the setup to make sure there are no surprises on the public brew day at the end of the month. Once a month will be normal, with small, low-effort brews on the Z to fill in the gaps.

debut

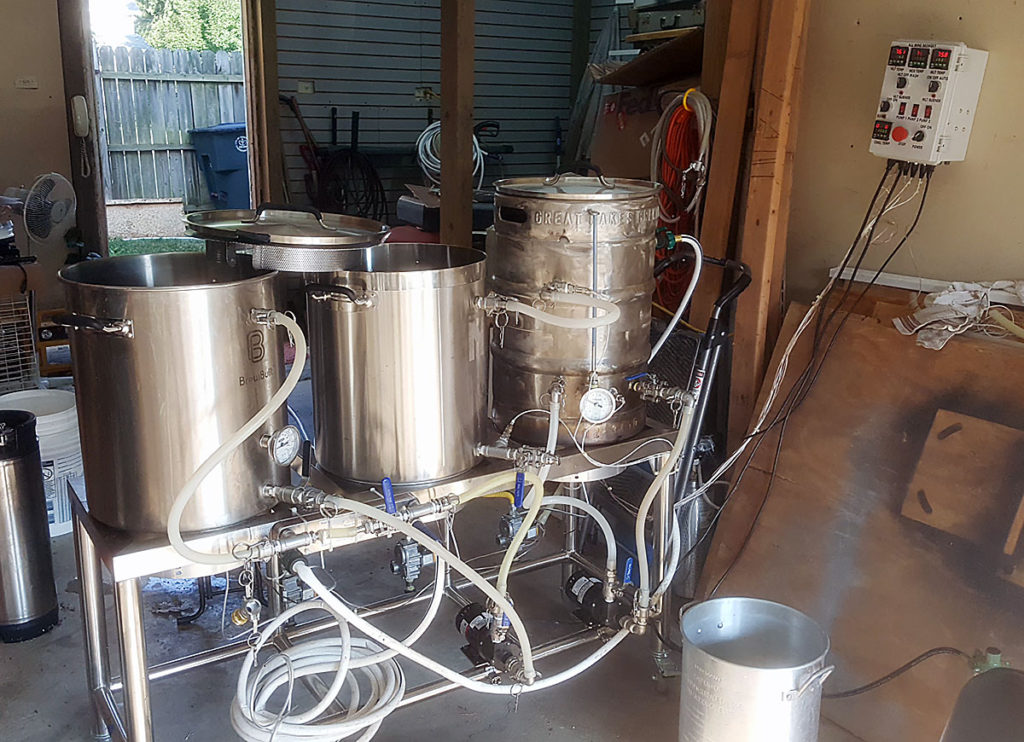
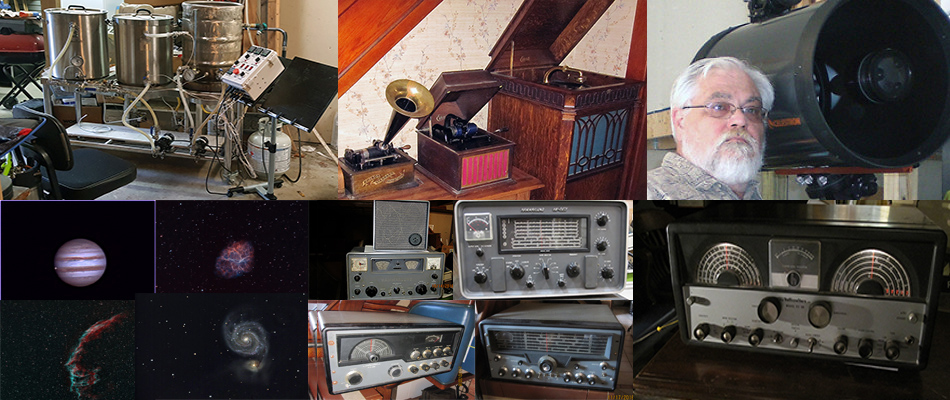
Did the first brew on the updated system today. It is a very different experience from using the Zymatic, which is all I have used since November. It is  a more modest change from brewing on my original three vessel gravity feed system, but a significant one. I can report that each design change ended up pleasing me. To anyone considering switching from gravity feed to a single tier system, or to HERMS, or to direct RIMS, or from a conventional counterflow chiller to a plate chiller, or to an Autosparge, or to PID burner control, or to a whirlpool setup: I encourage you to give it a go.

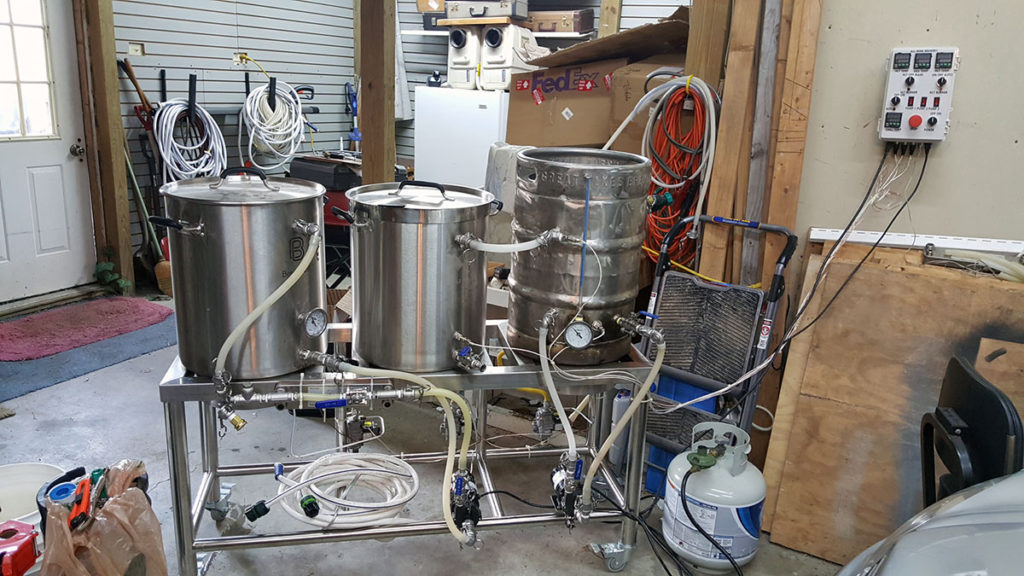
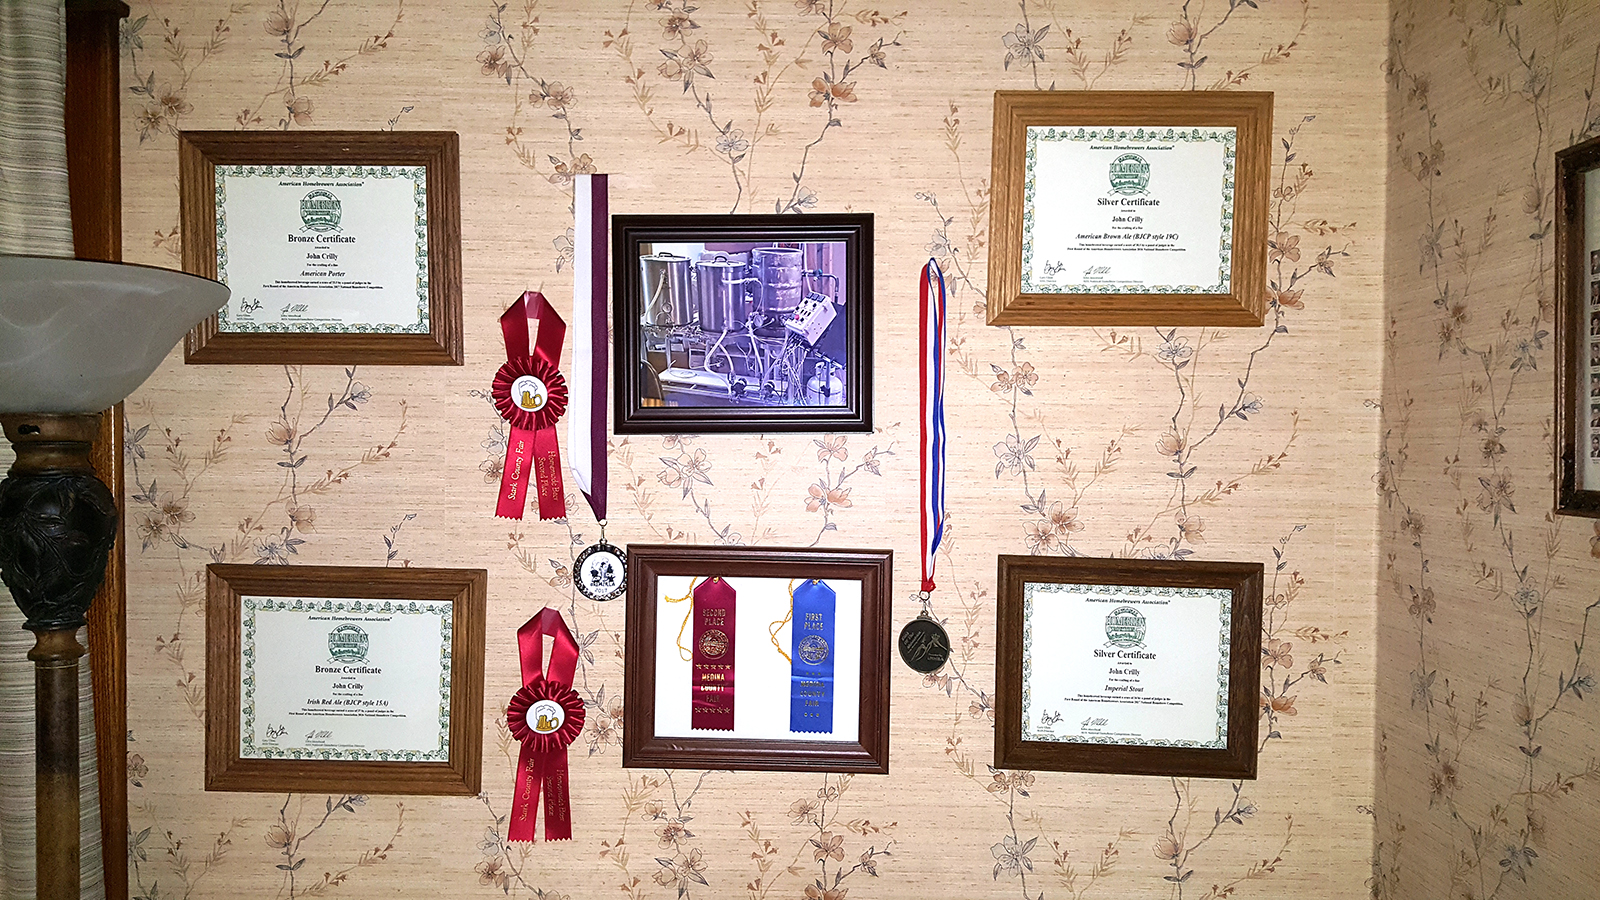
During today’s brew I found that I appreciated each and every upgrade from my original setup. There is no reason to think that any of the changes (or all of them combined) are going to suddenly make better beer – but I enjoyed having and using them. It is a hobby, after all, and if I am going to spend most of a Saturday doing it I want to enjoy it. The system delivered on that goal; I did enjoy it. Further, over the last few months I also enjoyed figuring out how I wanted to implement each change as well as the activity of putting the system together. I wimped out on building the stand itself as I don’t weld but I got to select each component of the system and put it all together the way I wanted to. It was rewarding to see each element performing as desired.

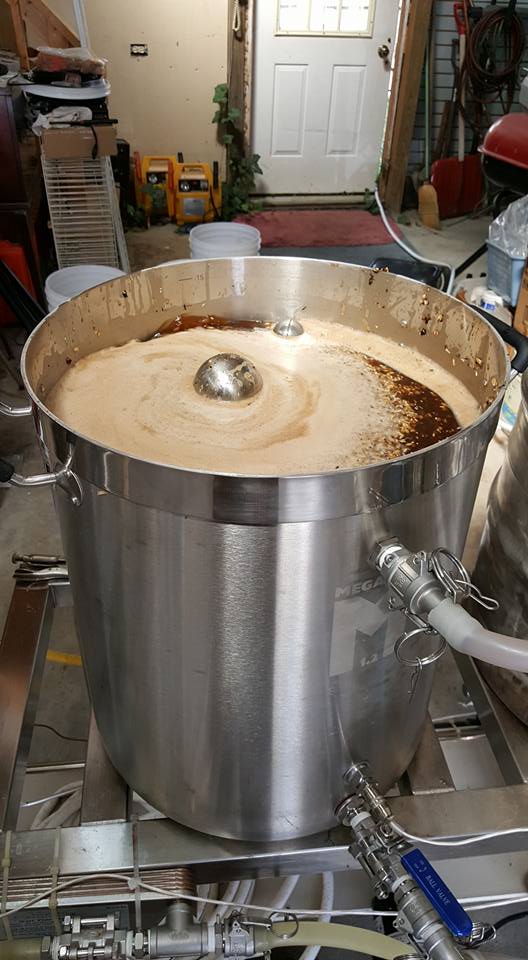
So: is it better than the Zymatic? It is certainly very different, and using it is a very different experience. The Zymatic is extremely easy to use while still giving the user complete control over the brewing process. One makes all of the same decisions – recipe, ingredients, mash temperature and duration, boil duration, hop additions, etc. It can then be left to its own devices to achieve all of these things, leaving the brewer free to attend to other matters. This compensates for the limited batch size (usually 2.5 to 3.5 gallons) by permitting more frequent brewing sessions. You don’t have to set aside an uninterrupted brew day. I use mine in my office and brew while conducting business.  This rig requires much more attention. I have to be there to tell it when to change temperatures. I have to be there to open and close valves and to move hoses and to turn pumps on and off. I have to be there to add hops at the appropriate times. I have to be there because from one to three large propane burners are operating most of the time and should not be unattended. I have seen some strong diatribes by those who feel that since the Zymatic eliminates much of this it isn’t “real” homebrewing. I don’t buy that; to me, homebrewing is about making decisions and implementing them. If the machine runs the valves and heaters under my command, the process is no less “pure” than if I stand there and perform the same functions by hand.

Conclusion: I like the Zymatic and will continue to use it, but less frequently (I have done 38 Zymatic brews since January). I have missed “normal” brewing and enjoy the hands-on aspect of using the new system as well, and will do dedicated brew days as time and weather permit.  Each has its place and fills its own role.

nearlythere


Had another burst of activity tonight despite high temps and humidity. Got two PIDs autotrained, both pumps mounted, and most hoses built and connected. I would have finished the hoses but have misplaced some of the connectors I had stashed. I’ll dig them out tomorrow (I hope).  Still need to train the third PID, mount the chiller RTD sensor, make up the last of the hoses, and make some changes that occured to me during tonight’s tests. Those will involve punching a couple more kettle holes but I have everything already set out to do that so it will be easy. I still haven’t found my old counterflow chiller so I’ll be using the plate chiller, which I hope to learn to trust as I use it. I always meant to switch over to it, but I trusted the counterflow chiller and hated to mess with that which works well.

Next stage, after everything works as it is, is to rig the (heavily) used 20 gallon Blichmann G1 pot I picked up for not much. It has LOTS of excess holes in it, including three 2″ triclamp fittings that were used for electric elements. I will have to cap a bunch of holes first, but the plan is to make it into a boil hettle so I can increase my max batch size. Then I can convert the existing 15G boil jettle into a hot liquor tank and get rid of the converted keg I am now using. I want to do it partly for esthetic reasons (I don’t like the looks of convered Sanke kegs), partly for ethical reasons (there is no easy way to tell whether a given Sanke keg was ever stolen but it is certain that some were), but mostly because I much prefer the fuel efficiency of a flat bottomed kettle. Once I eventually switch to natural gas it won’t be so big a deal, but I don’t know how much propane this rig is going to consume per brew session. The old rig rig used about 3-4 pounds per brew but it had smaller burners. I haven’t performed any meaningful delta-T tests but I observed about three degrees/minute heat rise in the MLT while recirculating through a HERMS heat exchanger that was exposed to room temperature air rather then to water at operating temperature. It should do better in service – and the other two burners are mounted closer to the kettles than that one so they should also do better. I never got three degrees/minute out of the old rig so this should be a nice improvement.